1.Checkout to the branch:
git checkout 6668a90

2.Merge the branch:
git merge remotes/origin/dev

3.Resolve conflicts manually.

4.Push the code:
git push origin HEAD:qa-team/khachane/FDEV-2813-overview-reports

5.Checkout to the branch:
git checkout qa-team/khachane/FDEV-2813-overview-reports

6.Verify the local branch is updated:
git pull origin dev
How to fix bitbucket conflicts ?
TestNG Basics
TestNG Annotations import org.testng.annotations.Test; import org.testng.annotations.BeforeClass; import org.testng.annotations.AfterClass; import org.testng.annotations.BeforeMethod; import org.testng.annotations.AfterMethod; import org.testng.annotations.BeforeSuite; import org.testng.annotations.AfterSuite; import org.testng.annotations.BeforeTest; import org.testng.annotations.AfterTest; @Test: Denotes a test method. @BeforeClass: Runs once before the first test method in the current class. @AfterClass: Runs once after all the test methods in the current class. @BeforeMethod: Runs before each test method. @AfterMethod: Runs after each test method. @BeforeSuite: Runs once before all tests in the suite. @AfterSuite: Runs once after all tests in the suite. @BeforeTest: Runs once before all tests within the currenttag. @AfterTest: Runs once after all tests within the current tag. TestNG Assertions: import org.testng.Assert; Assert.assertEquals(actual, expected); Assert.assertTrue(condition); Assert.assertFalse(condition); Assert.assertNull(object); Assert.assertNotNull(object); TestNG Parameters: import org.testng.annotations.Parameters; import org.testng.annotations.Optional; @Parameters({ "parameterName" }) @Test public void testMethod(@Optional("defaultValue") String parameterValue) { // Test method implementation } TestNG Data Providers: import org.testng.annotations.DataProvider; @DataProvider(name = "dataProviderName") public Object[][] dataProviderMethod() { // Return test data as a 2D array return new Object[][] { { data1 }, { data2 }, ... }; } @Test(dataProvider = "dataProviderName") public void testMethod(Object data) { // Test method implementation } TestNG Groups: @Test(groups = "groupName") public void testMethod() { // Test method implementation } TestNG Dependencies: @Test(dependsOnMethods = "methodName") public void testMethod() { // Test method implementation }
Appium Commands
Appium Commands

Installing Appium
Install Appium 2.0

> npm install -g appium@next

Appium Doctor
Install Appium Doctor

> npm install -g @appium/doctor

Check Android Setup

> appium-doctor --android

Check iOS Setup

> appium-doctor --ios

Appium Drivers
List Appium Drivers

> appium driver list

Install Driver

> appium driver install uiautomator2

Upgrade Driver

> appium driver update uiautomator2

Uninstall Driver

> appium driver uninstall uiautomator2

Appium Plugins
List Appium Plugins

> appium plugin list

Install Plugin

> appium plugin install relaxed-caps

Upgrade Plugin

> appium plugin update appium-dashboard

Uninstall Plugin

> appium plugin uninstall relaxed-caps

Appium Server
Start Appium Server

> appium server [list-of-options]

Appium Server Parameters (Optional)

--address: IP address where you want to run your tests on.

--port: Port number where the Appium server will start.

--base-path: Base path to be used in server URL, ideally this should be /wd/hub.

--use-drivers: Mention comma-delimited list of drivers to be activated.

--use-plugins: Mention comma-delimited list of plugins to be activated.

--log: File path where you want to save Appium server logs.

--log-filters: Add log filters to get only the required logs.

--log-level: Specify log levels that should be logged.

--log-timestamp: Add this if you want to have timestamps in the logs.

--local-timezone: Add the timezone for which you want to see the time in.

--debug-log-spacing: To add extra spacing in logs for debugging.

--allow-insecure: Mention all the insecure features which you want to be enabled by separating
  them with a comma.

--default-capabilities: Specify the default capabilities which you know will not change for your tests.
  You can override them by passing in the driver instance when creating the session.

--session-override: Add this if you want to override the existing session.

--webhook: ention the webhook URL where you want Appium logs to be redirected.

--strict-caps: Mention this when you want a strict check of passed capabilities.

--driver-xcuitest-webdriveragent-port: Mention WebDriverAgent port number.

--config: Specify the Appium config file path which Appium can use to configure.

--nodeconfig: Specify the Selenium Grid configuration file to connect to a grid.

--allow-cors: Use this when you want to allow Web to connect to your Appium server instance.

--relaxed-security: Use this to relax security check.

Start and Stop Appium Server

> appium server --address localhost --port 4723
--use-drivers uiautomator2 --base-path /wd/hub
--use-plugins appium-dashboard


App Management
Get App package name

var packageName = driver.getCurrentPackage ();

Get the current Activity name

var activityName = this.driver.currentActivity ();

Activate application

driver.activateApp ("com.domain.app.package");

Terminate application

driver.terminateApp ("com.domain.app.package");

Install application

this.driver.installApp ("");

Uninstall application

this.driver.removeApp ("");

Check if the application is installed

var isInstalled = this.driver.isAppInstalled ("");


Appium Java Client
Start Appium Server:

private AppiumDriverLocalService buildAppiumService () {
   final var logFile = Path.of (getProperty ("user.dir"), "logs", "appium.log")
       .toFile ();
   final var builder = new AppiumServiceBuilder ();
   return builder.withIPAddress (System.getProperty ("host", "127.0.0.1"))
       .usingPort (Integer.parseInt (System.getProperty ("port", "4723")))
       .withLogFile (logFile)
       .withArgument (GeneralServerFlag.BASEPATH, "/wd/hub")
       .withArgument (GeneralServerFlag.USE_DRIVERS, "uiautomator2")
       .withArgument (GeneralServerFlag.USE_PLUGINS, "appium-dashboard")
       .withArgument (GeneralServerFlag.SESSION_OVERRIDE)
       .withArgument (GeneralServerFlag.ALLOW_INSECURE, "chromedriver_autodownload")
       .build ();
}

Stop Appium Server:

if (this.service.isRunning ()) {
   this.service.stop ();
}

Setting Desired Capabilities:

private Capabilities buildCapabilities () {
   final var deviceName = getProperty (DEVICE_NAME_KEY, "Pixel_6_Pro");
   final var deviceVersion = getProperty (DEVICE_VERSION_KEY, "11");
   final var options = new UiAutomator2Options ();
   options.setPlatformName ("Android")
       .setPlatformVersion (deviceVersion)
       .setDeviceName (deviceName)
       .setAvd (deviceName)
       .setApp (Path.of (getProperty ("user.dir"), "src/test/resources/proverbial.apk")
           .toString ())
       .setAutoGrantPermissions (true)
       .setIsHeadless (parseBoolean (getProperty ("headless", "false")));
   return options;
}

Start Driver Session:

var capabilities = buildCapabilities ();
this.service = buildAppiumService ();
this.service.start ();
. . .
var serverUrl = this.service.getUrl ();
this.driver = new AndroidDriver (serverUrl, capabilities);

Stop Driver Session:

this.driver.quit ();

Update Driver Settings:

this.driver.setSetting (Setting.KEYBOARD_AUTOCORRECTION, false);

Update Driver Setting Via Capabilities:

options.setCapability ("appium:settings[setting-name]", "value");


Supported Locator Strategies

Accessibility ID:

var element = this.driver.findElement(AppiumBy.accessibilityId ("accessibility-id"));

ID:

var element = this.driver.findElement(AppiumBy.id ("element-id"));

Class Name:

var element = AppiumBy.className ("some.class");

XPath:

var element = AppiumBy.xpath (".//android.widget.Button[@text='COLOR']");

Android Ui Selector:

var element = AppiumBy.androidUIAutomator ("new UiSelector().text("some-text")");

Android Data Matcher:

var element = AppiumBy.androidDataMatcher (new Json ().toJson (ImmutableMap.of (
 "name", "hasEntry",
 "args", ImmutableList.of ("title", "App")
)));

Android View Matcher:

var element = AppiumBy.androidViewMatcher (new Json ().toJson (ImmutableMap.of (
 "name", "withText",
 "args", "Animation",
 "class", "androidx.test.espresso.matcher.ViewMatchers"
)));

iOS Predicate String:

var element = AppiumBy.iOSNsPredicateString ("label == "Colour" AND name == "color"");

iOS Class Chain:

var element = AppiumBy.iOSClassChain ("**/XCUIElementTypeButton[`label == "Colour"`]");


Device Actions

Take a Screenshot:

final var file = ((TakesScreenshot) this.driver).getScreenshotAs (FILE);
  try {
     FileUtils.copyFile (file, new File (fileName));
  } catch (final IOException e) {
     e.printStackTrace ();
  }

Get screen size:

driver.manage ().window ().getSize ();

Check if running on Device Browser:

var isWebApp = driver.isBrowser ();

Open a Deeplink:

driver.get ("someapp://deeplink/to/screen");

Get Session ID:

var sessionId = driver.getSessionId ();

Handle Alerts:

var message = this.driver.switchTo ()
  .alert ()
  .accept ();

Switch context to WebView:

driver.context ("WebView-name");

Get all the available contexts:

var handles = driver.getContextHandles ();

Get Battery percent level:

var batteryPercent = driver.getBatteryInfo ().getLevel ();

Get Battery state:

var batteryState = driver.getBatteryInfo ().getState ();

Check if the keyboard is visible:

var isKeyboardVisible = driver.isKeyboardShown ();

Hide keyboard:

driver.hideKeyboard ();

Android specific actions:

Open Notifications panel

To open the notification panel on your device, use the following command:

driver.openNotifications ();

Toggle Location services

To toggle location services ON / OFF on the device, use the following command:

driver.toggleLocationServices ();

Toggle Mobile Data

To toggle mobile data ON / OFF on the device, use the following command:

driver.toggleData ();

Toggle WiFi

To toggle WiFi ON / OFF on the device, use the following command:

driver.toggleWifi ();

Toggle Airplane Mode

To toggle Airplane mode ON / OFF on the device, use the following command:

driver.toggleWifi ();

Toggle Airplane Mode

To toggle Airplane mode ON / OFF on the device, use the following command:

driver.toggleAirplaneMode ();

Lock device:

driver.lockDevice ();

Check if device is locked:

var isLocked = driver.isDeviceLocked ();

Unlock device:

driver.unlockDevice ();

Get Clipboard Text:

var text = driver.getClipboardText ();

//OR

var text = driver.getClipboard (ClipboardContentType.PLAINTEXT);

Video recording:

// For Android

var option = AndroidStartScreenRecordingOptions.startScreenRecordingOptions ()
  .withTimeLimit (Duration.ofMinutes (5));

// For iOS

final var option = IOSStartScreenRecordingOptions.startScreenRecordingOptions ()
   .withTimeLimit (Duration.ofMinutes (5));
this.driver.startRecordingScreen (option);

Video stream real-time:

private void startStreaming () {
    final var args = new HashMap ();
    args.put ("host", "127.0.0.1");
    args.put ("port", 8093);
    args.put ("quality", 75);
    args.put ("bitRate", 20000000);
    this.driver.executeScript ("mobile: startScreenStreaming", args);
 }


Pull device file to local:

byte [] fileContent = driver.pullFile ("/device/path/to/file");

Push local file to the device:

try {
   this.driver.pushFile ("/device/path/to/folder", new File ("/local/file/path"));
} catch (IOException e) {

   // Do some error handling

}

Swipe up on screen:

private void swipe () {
   final var size = this.driver.manage ()
       .window ()
       .getSize ();
   final var start = new Point (size.getWidth () / 2, size.getHeight () / 2);
   final var end = new Point (start.getX (), start.getY () - (start.getY () / 2));


   final var finger = new PointerInput (PointerInput.Kind.TOUCH, "Finger 1");
   final var sequence = new Sequence (finger, 0);
   sequence.addAction (
       finger.createPointerMove (Duration.ZERO, PointerInput.Origin.viewport (), start.getX (), start.getY ()));
   sequence.addAction (finger.createPointerDown (PointerInput.MouseButton.LEFT.asArg ()));
   sequence.addAction (
       finger.createPointerMove (ofMillis (600), PointerInput.Origin.viewport (), end.getX (), end.getY ()));
   sequence.addAction (finger.createPointerUp (PointerInput.MouseButton.LEFT.asArg ()));
   this.driver.perform (singletonList (sequence));
}


Android Emulator Device Actions

Modify Network speed:

driver.setNetworkSpeed (NetworkSpeed.FULL);

Use Fingerprint:

driver.fingerPrint (1);

Update Geolocation:

driver.setLocation (new AndroidGeoLocation (, ));

Get Geolocation:

var location = driver.location ();


App Management

Get App package name:

var packageName = driver.getCurrentPackage ();

Get the current Activity name:

var activityName = this.driver.currentActivity ();

Activate application:

driver.activateApp ("com.domain.app.package");

Terminate application:

driver.terminateApp ("com.domain.app.package");

Install application:

this.driver.installApp ("");

Uninstall application:

this.driver.removeApp ("");

Check if the application is installed:

var isInstalled = this.driver.isAppInstalled ("");
Test script to run login script with muiltple users in cypress
Test script to run login script with muiltple users in cypress

Following is example test

01_multiple_user_login.cy.ts

import { action, commonElements} from "../../constants/selectors";
import "../../support/commands";
const testUsers = require('../../fixtures/userList.json')

describe("Verify and check login functionality", () => {
    it('Verify and check login functionality for all users',async function(){
        testUsers.forEach(user => {
            let userEmail = user.user_email;
            let userPassword = user.password;
            cy.login(userEmail,userPassword)
  			cy.loginVerification()
   			cy.logout(userEmail,userPassword)
  			cy.logoutVerification()
        });
   });
});

Need to create following file under fixture folder
userList.json

[
    {
        "user_email": "abc@testmail.com",
        "password": "abc@123"
    },
   {
       	"user_email": "abc1@testmail.com",
        "password": "abc1@123"
    },
    {
        "user_email": "abc2@testmail.com",
        "password": "abc2@123"
    }
]


What Is New In Appium 2.0?
1. Appium 2 Installation

npm i -g appium@next

2. Driver Installation

From Appium 2.0 drivers can be installed/uninstalled or updated independently. For example,
  if an update is available for XCUITest then rather than waiting for a new Appium server
  release we can update the driver only by using CLI commands.

  Install IOS Driver in Appium 2:

  appium driver install xcuitest

  Install Android Driver in Appium 2:

  appium driver install uiautomator2

  How to Update Driver:

  appium driver update xcuitest

  Update Multiple drivers :

  appium driver update xcuitest,uiautomator2

  How to check all available/Installed drivers

  appium driver list


3. Capabilities In Appium 2.0

Now User needs to include the vendor prefix in the non-standard capabilities names.
  For Example, if you wish to provide deviceName in capabilities, it should consist of the
  vendor prefix “appium:deviceName“.

  Appium 1 (Older way):
Earlier in the Appium 1. x version we used to define capabilities using DesiredCapabilities
  class to set various properties and preferences that define how an automation session should be
  established with a mobile device or an emulator.

DesiredCapabilities androidCaps = new DesiredCapabilities();
       androidCaps.setCapability("deviceName", "Pixel XL API 30");
       androidCaps.setCapability("automationName", "UIAutomator2");
       androidCaps.setCapability("udid", "emulator-5554");
       androidCaps.setCapability("platformName", "Android");

     androidCaps.setCapability("app",System.getProperty("user.dir") + "/src/test/resources/files/Bilgikolik.apk");

      androidCaps.setCapability("appPackage", "com.testapp.app");
      androidCaps.setCapability("appActivity", "com.testapp.app");
  driver = new AndroidDriver(newURL("http://127.0.0.1:4723"),androidCaps);
Appium 2 Capabilities
In Appium 2, we use UiAutomator2Options class that provides information to Appium about
  the desired configuration for the test session. Refer below code.

UiAutomator2Options capabilities = new UiAutomator2Options();
 capabilities.setPlatformName("Android").setAutomationName("UIAutomator2")
               .setAppPackage("Package Name").setAppActivity("Activity Name")
               .setApp("App Path");
AndroidDriver driver = new AndroidDriver(new URL("http://0.0.0.0:4723/"),c


4. Appium Inspector

  Appium 2.0 segregated Appium Inspector from Appium Desktop. Also, the Appium team provided
  the browser version of the Appium inspector.  To test against local servers, you’ll need to
  start the server with --allow-cors so that the browser-based version of Appium Inspector can
  access the Appium server to start sessions.


5. Changes In Drivers and Classes


SelendroidDriver class is removed.
MobileElement classes including AndroidElement and iOSElement classes are removed. It is recommended
  to use WebElement.
@AndroidFindBy(xpath ="//android.widget.TextView[@text='Continue']")
 private WebElement Continue;
Mobile By Class has been removed, and AppiumBy Class has been introduced.
Older Way:

driver.findElement(MobileBy.id("loginbutton")).click();
New Way:

driver.findElement(AppiumBy.id("loginbutton")).click();
All locator names in AppiumBy have been aligned to follow the camelCase naming strategy,
  e.g. MobileBy.AccessibilityId was changed to AppiumBy.accessibilityId.
Appium Driver is directly inherited from Selenium’s RemoteWebDriver. There is no intermediate
  layer between AppiumDriver and RemoteWebDriver.
ResetApp, launch apps, and closeApp methods have been depreciated.
Appium Inspector is split out from Appium Desktop. Appium Inspector can be used with its web
  version without downloading anything.


6. TouchAction/MultiTouchAction

  From Appium 2.0 both TouchAction and MultiTouchAction class has been depreciated.W3c Action
  API will be used for automating gestures. For Example, the double Click Gesture can be achieved using the below code:

driver.executeScript("mobile: doubleClickGesture", ImmutableMap.of(
   "elementId", ((RemoteWebElement) element).getId());

  Reference Link Click here
Selenium 4: Understanding Key Features
1. Enhanced Selenium Grid

  The new Selenium Grid comes with Docker support. This will enable developers or testers
  to spin up the containers rather than setting up heavy virtual machines. Moreover, it is
  redesigned in a way that will allow QAs to deploy the grid on Kubernetes for better scaling.
  Managing Selenium Grid is now smooth and easy as there will no longer be any need to set up
  and start hubs and nodes separately. Teams or individual testers
  can now deploy the grid in three modes:
		Standalone mode
		Hub and Node
		Fully distributed

2. Upgraded Selenium IDE

  Most QA engineers using the Selenium tool suite are familiar with the popular record and
  playback tool – Selenium IDE. This Selenium IDE was earlier available just as a Firefox add-on.
  Later, it got deprecated with the introduction of the latest Firefox versions. This is because
  the add-ons in the latest Firefox (ver. 55) were standardized under the Web
  Extension mechanism.With Selenium 4, the IDE is revived and now its add-on is available
  for major web-browsers like Firefox and Chrome. The add-on for Selenium IDE is now also
  available on the MS store.The new Selenium 4 IDE provides some notable features
  like:Improved GUI for intuitive user experience.The new IDE also comes bundled with a SIDE tool
  aka Selenium IDE runner. It allows QAs to run .side projects on a node.js platform. This
  SIDE runner also enables individual QAs to run cross browser tests on local or Cloud Selenium
  Grid.Improved control flow mechanism that enables testers to write
  better “while” and “if” conditions. The new IDE comes with an enhanced element locator strategy
  (Like a backup strategy) which helps locate an element in case the web element couldn’t be located.
  It will result in the creation of stable test cases.The code for test cases recorded using Selenium
  IDE can be exported in the desired language binding like Java, C#, Python, .NET, and JavaScript.


3. Relative Locators in Selenium 4

  Selenium 4 brings an easy way of locating elements with the inclusion of relative locators.
  This means testers can now locate specific web elements using intuitive terms that are often
  used by users like:

		To left of
		To right of
		Above
		Below
	The introduction of this new method in Selenium 4 helps locate web elements based on the visual
  location relative to other DOM elements. One can refer to this source to learn more about the
  implementation of relative locators in detail.

4. Improved Documentation

  The documentation section has been revamped significantly with a neat UI for navigating to
  the desired section or page. This will help testers and developers find relevant information they need
  for a specific tool, language binding, etc.The exhaustive documentation covers information about all
  tools and APIs under the Selenium umbrella. This will help individual testers (particularly the beginners)
  get acquainted with all the features and prerequisites to get started with automation testing.


5. Support for Chrome Debugging Protocol


	Selenium 4 comes with native support for Chrome DevTools Protocol. This means QAs can now
  use Chrome development properties like Fetch, Network, Profiler, Performance, Application cache,
  and more. QAs can also leverage the APIs offered by Chrome DevTools to simulate poor network
  conditions and perform geolocation testing. Using this API will also help developers or QAs to test
  and resolve critical bugs for specific web-pages faster and on the fly.

6. Better Window/Tab Management in Selenium 4

  	There are several instances in test automation wherein one might need to open a particular
  link in a new tab or window to perform certain actions. To achieve this in Selenium 3, QAs had
  to create a new driver object and then perform the switch operation using the WindowHandle method
  to perform subsequent steps. This is set to change in Selenium 4 as it comes with a
  new API – newWindow that allows users to create and switch to a new window/tab without creating
  a new WebDriver object. Sample

  code snippet to open a new window

 	 driver.get("https://www.google.com/");
	// Opens a new window and switches to new window
	driver.switchTo().newWindow(WindowType.WINDOW);

	// Opens BrowserStack homepage in the newly opened window
	driver.navigate().to("https://www.browserstack.com/");

  Sample code snippet to open a new tab within the same window

  	driver.get("https://www.google.com/");
	// Opens a new tab in existing window
	driver.switchTo().newWindow(WindowType.TAB);

	// Opens Browserstack homepage in the newly opened tab
	driver.navigate().to("https://www.browserstack.com/");


7. Deprecation of Desired Capabilities

  Desired Capabilities were primarily used in the test scripts to define the test environment
  (browser name, version, operating system) forexecution on the Selenium Grid.

	In Selenium 4, capabilities objects are replaced with Options. This means testers now need to create an Options
  object, set test requirements, and pass the object to the Driver constructor.

	Listed below are the Options objects to be used going forward for defining browser-specific capabilities:

		Firefox – FirefoxOptions
		Chrome – ChromeOptions
		Internet Explorer (IE) – InternetExplorerOptions
		Microsoft Edge – EdgeOptions
		Safari – SafariOptions
8. Modifications in the Actions Class

  Actions class in Selenium is primarily used to simulate input actions from mouse and keyboard on
  specific web elements (For eg: Left click, Right click, Double click, etc)

	In Selenium 4, several new methods have been added to the Actions class:

	click(WebElement)
	This method is added to Actions class to replace the moveToElement(onElement).click().
  It is used to click on a certain web element.

	clickAndHold(WebElement)
	This method will replace the moveToElement(onElement).clickAndHold().
  It is used to click on an element without releasing the click.

	contextClick(WebElement)
	This method will replace moveToElement(onElement).contextClick().
  It will perform the right click operation.

	doubleClick(WebElement)
	This method is added to replace moveToElement(element).doubleClick().
  It will perform a double click on an element.

	release()

  Reference Link:- Click here
How to set up Cypress and Typescript End to End Test Automation Framework from Scratch Step by Step Guide.
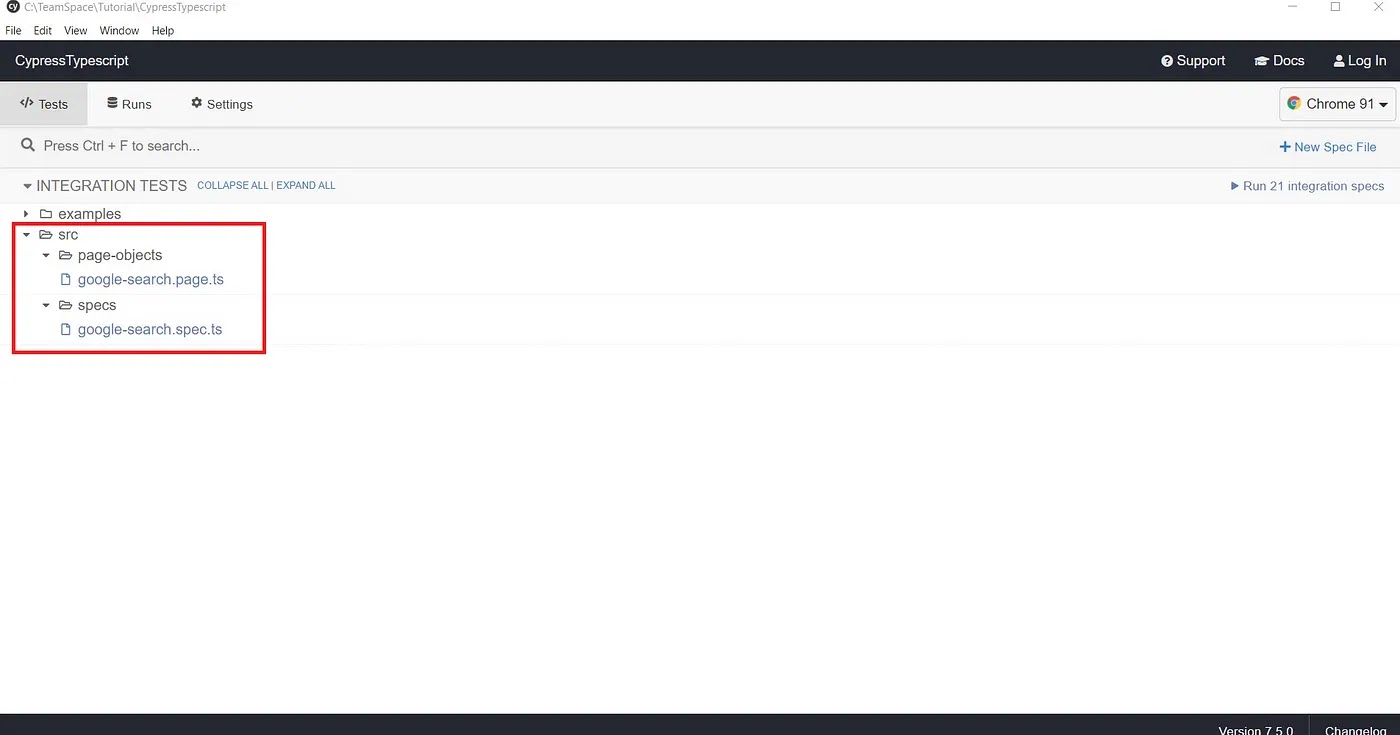
Pre-requisite::- 1. Install NodeJS: If you don’t have NodeJS installed in your system navigate to https://nodejs.org/en/download/ and choose LTS download and install.2. Install Visual Studio Code: If you don’t have Visual Studio Code on your computer Navigate to https://code.visualstudio.com/download download and install.Step by Step Guide to Configure / Set up Cypress Typescript Automation Framework Step 1: Create a Project Folder The first step is to create a new folder on your computer desired location. Below I am creating CypressTypescript as the project folder.Step 2: Open Project Folder CypressTypescript in Visual Studio Code i.Open, Visual Studio Code, Click on File > Open Folderii. Choose, CypressTypescript Folder and Click on Select Folder at the bottomStep 3: Create pacakge.json folder Open Terminal, In Visual Studio Code by clicking on Terminal Menu > Choose New Terminal. Note: Ensure New Terminal opened in the working directory as CypressTypescriptiv. New Terminal window appears at the bottom of Visual Studio Code, In the new terminal type below commandnpm initv. It will ask you a set of questions if you want to type desired text, else hit [Enter] key one by one until you get the message Is this Ok?, Then again hit enter it will create package.json for youStep 4: Install Cypress: In the Visual Studio Code, you need to type below commandnpm install cypress --save-devStep 5: Open Cypress The first time when you enter the cypress open command it will create a default setup for you, which also includes directories like cypress, integration, fixtures, etc. To open cypress enter the below command in your terminal windownpx cypress openAfter the execution of the above command, it will create, default cypress framework for you and also opens the cypress window. At this point just close the Cypress window.At this point, your CypressTypescript folder should look like thisStep 6: Install Typescript using the below command typing in Terminal In the Visual Studio Code Terminal type the below commandnpm i typescriptStep 7: Create Typescript config file (tsconfig.json) In the Visual Studio Code Terminal type the below command to create tsconfig.json file using the below commandnpx tsc --initStep 8: Create srcfolder inside e2e Folder Step 9: Create page-objects a folder Step 10: Create specs folderStep 11: Create a first page-object file inside the page-objects folder Using Visual Studio Code, Create a file named google-search.page.ts . This file should sit inside page-objects folder created in Step 9. Copy and paste the below code into the file google-search.page.ts.//Inside your google-search.page.ts file. This is pageobject file. ///Step 12: Create the first spec inside the specs folder Using Visual Studio Code, Create a file named google-search.spec.ts . This file is created inside spec folder created in Step 10 Copy and paste the below code into the file google-search.spec.ts.export class GoogleSearch{ googleSearch(){ return cy.get('input[name="q"]').first(); } googleSearchBtn(){ return cy.get('input[name="btnK"]').first(); } searchResults(){ return cy.get('h3').first(); } } //This is spec file, inside your google-search.spec.ts import {GoogleSearch} from "../page-objects/google-search.page"; const search = new GoogleSearch(); describe('Google Navigation', () => { it('Google Search', () => { cy.visit('https://www.google.com') search.googleSearch().type("Something"); search.googleSearchBtn().click(); search.searchResults().should('be.visible'); }); });Step 13: Configuring tsconfig.json file So, You have completed, page-object file, spec file. If you see those files you have created file with a .ts extension, that means we are using typescript in this project. In order for Cypress to understand typescript, we need to configure it. i.In Step 7 you have already created the tsconfig.json file. ii.Navigate to tsconfig.json file iii.Remove all default settings inside it. iv.Copy and paste the below code{ "compilerOptions": { "target": "es5", "lib": ["es5", "dom"], "types": ["cypress"] }, "include": ["**/*.ts"] }Step 14: Execute your first test In the VisualStudio Code Terminal, Make sure the terminal present working directory is CypressTypescript. Type below commandnpx cypress openClick on the google.search.spec.ts file in the above window. BOOM!!! your tests stats running in the browser. Once it gets finished you will see the resultHow to Execute Cypress tests using the command-line interface Cypress CLI?npx cypress run --spec="./cypress/integration/src/specs/google-search.spec.ts"By default, Cypress doesn’t support XPath as a selector, if you want to use Xpath in cypress please install the cypress-xpath npm packagenpm i cypress-xpathTo get support for the typescript uses the line ///in your spec file. Below is the example ///2.Setting up .gitignorein your project Once you set up the code definitely you want to check into a git repository, if you are checking in the git repository you don’t have to push all the code such as node-modules folder etc. for that create one file in your project folder (CypressTypescript) name it as .gitignore any folders and files which you mention here will be automatically ignored by git, which will not be checked into the repository. Example code for .gitignoredescribe('Example', () => { it('Example', () => { //test something }); }); # End to End Tests dist/ node_modules/ obj/ logs/ *.log *.txt testresults/ screenshots/ package-lock.json


Cypress Tutorials for beginners
Important Links for QA to learn Cypress
Important Links for QA to learn cypress using youtube channels
Responsive Web Design Testing Tools 2023
Important Links for QA to verify website into different devices and screen resolutions
Important Links for QA to List out different devices and screen resolutions
Mobile App Security Scanner Tool ( MobSF )
Step 1 : Download tool from following url https://github.com/MobSF/Mobile-Security-Framework-MobSFStep 2 : Import framework into IntelliJ or Any other editor Step 3 : Open IntelliJ Terminal and execute following command. It will installed all depedencies ./setup.shStep 4 : Lanuch tool. Execute following command to launch tool ./run.sh 127.0.0.1:8000Step 5 : Open tool url http://127.0.0.1:8000/Step 6 : Just drag and drop .apk or .ipa file. It will start scanning and Will display resultNOTE: We can use following application fo jailbroke iOS device https://cydia.saurik.com/ And following ways to rooted Android device https://www.digitaltrends.com/mobile/how-to-root-android/


How to create shortcut to launch emulator and Simulator ?
To create shortcut for emulator launch STEP 1: Identify list of emualtors available into system Open Terminal and execute following command emulator -list-avds ouput :STEP 2: Create a batch file to launch emulator Open TextEdit Add following commands Note: Add emulator name which we want to launchAnd Save file as text file STEP 3: Provide persmission to launch file using bash shell First go to the directory where file has saved cd /Users/apple/Desktop/DeviceLaunch/Then provide permissions chmod +x ./androidAPI31device.txt Note: This will give exec permission to user, group and other, so beware of possible security issues. So we can use chmod u+x ./androidAPI31device.txt, This will grant exec permission only to userSTEP 4: Set default file open in Terminal Right Click on file -> Open with " Other "-> Enable " All files" option-> Search " Terminal " -> Ticked always open with option and Click on Open StEP 3: Launch Emulator Just dobule clicked on the file and emulator will be launched To create shortcut for simulator launch STEP 1: Identify list of emualtors available into system Open Terminal and execute following command xcrun simctl list ouput :STEP 2: Create a batch file to launch simulator Open TextEdit Add following commands #! /bin/bash open -a Simulator.appSTEP 3: Provide persmission to launch file using bash shell First go to the directory where file has saved cd /Users/apple/Desktop/DeviceLaunch/Then provide permissions chmod +x ./iOS14_5Simulator.txt STEP 4: Set default file open in Terminal Right Click on file -> Open with " Other "-> Enable " All files" option-> Search " Terminal " -> Ticked always open with option and Click on Open StEP 3: Launch Simulator Just dobule clicked on the file and Simulator will be launched


How to set PATH variables into macbook ?
How to set Path variables into mac Open terminal and hit following command vim ~/.zshrc Then Select proper option Read Only , Edit , Delete etc. Then Add required varible path Refer following varibles which is used for Android and iOS automation on macbookIf VI is not working then hit following command and try commands again. export PATH="/usr/local/bin:/usr/bin:/bin:/usr/sbin:/sbin"

How to identify if an app is native or flutter
You can find whether an app is using flutter or not by using the following method,

1) Extract the apk file. You can simply rename the file extension to .zip and extract it.
2) Navigate to the lib folder.
3) You will find a list of subfolders for different architectures.
4) The subfolder will contain a libflutter.so file. This libflutter.so will be present in all
  flutter apps.
Sauce Lab Cloud APPIUM Automation Demo
First We need to create free trail account on Sauce Lab

  https://saucelabs.com/


Login Sauce Lab Account and Open following url . We will get all necessary steps in below document which is provided by Saucelab


  https://www.browserstack.com/docs/app-automate/appium/getting-started/java


We will get sample app for android and iOS on following sauce lab link

  https://github.com/saucelabs/sample-app-mobile/releases


We will get devices list on following link
  https://saucelabs.com/platform/supported-browsers-devices
Note: Username and Access key is important while performing testing sauce lab

  Execution
How to install iOS and Android build into Simulator/Emulator through Terminal
  In IOS
We need .app file to install into iPhone Simulator

Then Open terminal and follow given below steps

  1) Enter following command to get device list

  xcrun simctl list

  2) Then Copy simualtor UDID which we want to install app

  3) Enter following command to install app

  xcrun simctl install 700332EF-8DE1-4040-B5F9-CC56D9CB1554 ~/Desktop/Runner.app

  where 700332EF-8DE1-4040-B5F9-CC56D9CB1554 is simulator UDID and ~/Desktop/Runner.app is path of .app file


  In ANDROID,
   We need .apk file to install into android emulator

    Then Open terminal and follow given below steps

    1) Enter following command to get device list

    adb install ~/Desktop/46.apk

    where ~/Desktop/46.apk is path of apk
Abstarct and Interface Class/ Methods use in Selenium Webdriver
Selenium is an interface and the Class like FirefoxDriver, ChromeDriver,
  InternetExplorerDriver, SafariDriver and AndroidDriver which implement the
  Selenium interface has their own implementation for the all the abstract methods
  in Selenium interface. So all the Classes are implementing the same interface to
  have the same methods across all the browsers but the methods implemented
  (coding of method body) will be different for FirefoxDriver (to make the automation
  work for Firefox Browser) and ChromeDriver (methods implemented differently to make
  the automation work on Chrome Browser)


WebDriver driver = new FirefoxDriver();

Or

WebDriver driver = new ChromeDriver();

Here, WebDriver Is Interface and FirefoxDriver and ChromeDriver are the class files where
WebDriver Interface Is Implemented.
Use of Collection and Selenium Webdriver
Collections in java is a framework that provides an architecture to store and manipulate the group of objects. The Collection helps the user to store only the Object class type, but every single class in java is subclass to Object class, which means we can store anything with help classes present in the collection. Where we use collections in selenium : Whenever we deal with more than one item, then we use collections in selenium webdriver. Few places are: when we try to retrieve the more than one match of elements when we handle multiple tabs/windows When we retrieve option from the dropdown using getOptions() method how to use arraylist in selenium webdriver As per my knowledge, we do not use ArrayList in selenium, but we do use List. People prefer List over ArrayList because when you use a List, you can store a different kind of list categories like ArrayList, LinkedList, TreeList so on. But when we use ArrayList, then we can only store only the ArrayList type. This is the primary reason why the findElements method returns List(broad) rather than ArrayList(narrow).Now if you are like me then you get this doubt, why cannot I use ArrayList for it instead of List.So we have to store the value based on the return type only, so when you should store the list of web elements using List only. But I did not mean that we cannot store the list of web elements in ArrayList, but it is not recommended. If you think who cares about the recommendation, then you got to downcast the returned values to store it in ArrayList with selenium.For example, if we want to verify a value by splitting the string output, then splitting always returns an Array of values., there values will be substrings.Few things to remember about for each loop: It starts with the keyword for like a normal for-loop. Instead of declaring and initializing a loop counter variable, you declare a variable that is the same type as the base type of the array, followed by a colon, which is then followed by the array name. In the loop body, you can use the loop variable you created rather than using an indexed array element. It's commonly used to iterate over an array or a Collections class (e.g., ArrayList, HashSet) You might need to declare a variable outside the loop if you want to terminate the loop after some iterations how to use Set in selenium webdriver Java Set is a collection of objects that allows no duplicate elements to be stored. Java Set is an interface that extends the Collection interface. Unlike List, Java Set is NOT an ordered collection; its elements does NOT have a particular order. Java Set does NOT provide control over the position where you can insert an element. You cannot access elements by their index and also search elements in the list. Set is used when we are dealing with a unique element or values like window handles, getWindowHandles()returns set of String Set allGUID = driver.getWindowHandles(); how to use the Map in selenium We can use Maps or hashMaps in selenium when we want to read key-pair values; For example, when we read data from the properties files or JSON file, we would be using HashMaps along with Selenium. Maps are perfect to use for key-value association mapping such as dictionaries. The maps are used to perform lookups by keys or when someone wants to retrieve and update elements by keys. Some examples are: A map of error codes and their descriptions. A map of zip codes and cities. A map of managers and employees. Each manager (key) is associated with a list of employees (value) he manages. A map of classes and students. Each class (key) is associated with a list of students (value).


JMeter Jenkins Integration
STEP 1: Install JMeter https://jmeter.apache.org/download_jmeter.cgi STEP 2: Create a sample script in jemter Start JMeter Go to the bin folder exist in downloaded JMeter folder and Double click onApacheJMeter.jarAdd Thread Group ex. demo and add Number of threads, remp up time and Loop countThen Add Http RequestThen add Table and Graph ListenerThen Add some assertion points for request verification ex status code, duration , SizeThen Execute ScriptNow save script in to default location . ex /Users/apple/Desktop/apache-jmeter-5.4.1/bin STEP 3: Create job in Jenkins First install Performance Trend Per Test Case plugin from plugin manager Create a free style job ex. jmeter jenkins demo Then add following configurationcd /Users/apple/Desktop/apache-jmeter-5.4.1/bin sh jmeter.sh -Jjmeter.save.saveservice.output_format=xml -n -t /Users/apple/Desktop/apache-jmeter-5.4.1/bin/Demo.jmx -l /Users/apple/Desktop/apache-jmeter-5.4.1/bin/TestResult1.jtlfirst part is jmeter script and another is report generation file name and locationThen add peformance Trend report in post buildThen execute build 3-4 times , we will get following reportsExecution Demo


Subscribe to:
Posts (Atom)